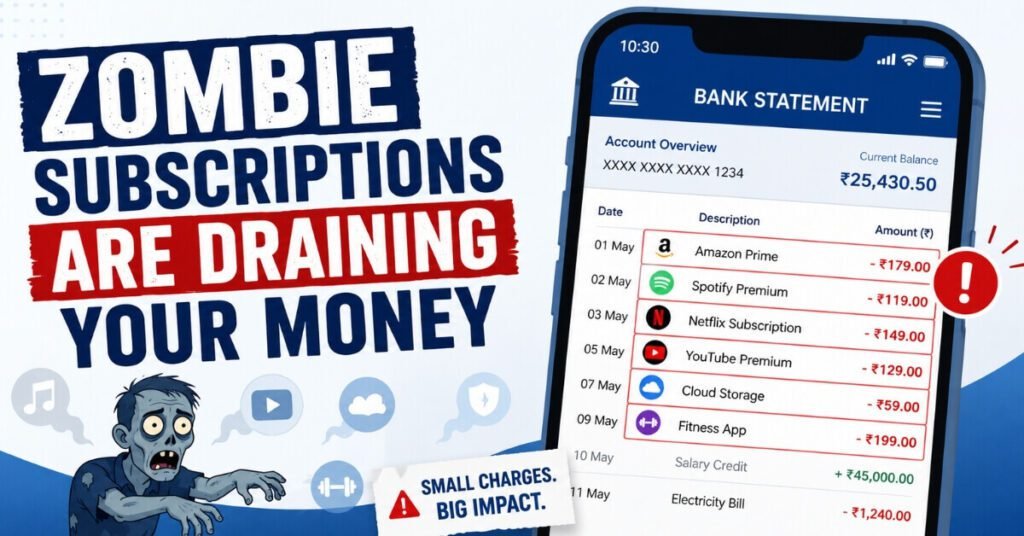
If you have ever opened your bank statement and wondered “what is this charge for?”, you are not alone. Millions of smartphone users are quietly losing money every month to forgotten charges they signed up for years ago. This guide on how to find and cancel zombie subscriptions on phone will walk you through the exact steps for both iPhone and Android, so you can stop wasting money and take back control of your recurring payments in 2026.
Learning how to find and cancel zombie subscriptions on phone is one of the simplest personal finance habits you can build this year. A free trial you tried once, an app you downloaded for a single project, or a service you subscribed to during a sale can all quietly turn into recurring charges that keep billing your card long after you stopped using them. The scary part is that most people never notice because the amounts are usually small enough to slip past a quick glance at a bank statement.
What Are Zombie Subscriptions?
Zombie subscriptions are recurring payments for apps, services, or memberships that you signed up for at some point but no longer actively use. Before you learn how to find and cancel zombie subscriptions on phone, it helps to understand why these charges are so hard to notice in the first place. Unlike a subscription you check regularly, these charges live in the background of your phone, billing you month after month without ever showing up in your daily routine.
The term “zombie” fits perfectly because these payments refuse to die on their own. Even after you delete an app from your phone, the billing behind it often keeps running unless you manually cancel it through the app store. This is the number one reason these charges survive for years without anyone noticing.
According to recent consumer spending studies, the average smartphone user has at least one or two forgotten charges active at any given time, together costing anywhere from a few hundred to a few thousand rupees or dollars every year. Multiply that across millions of users worldwide, and it becomes clear why this has become such a widely discussed personal finance problem in 2026.
Modern apps are built around the subscription model because it guarantees predictable revenue, so very few make cancellation easy — sign-up is fast, but the cancel button is often buried deep in the menus. This imbalance is exactly why so many people never learn how to find and cancel zombie subscriptions on phone until years of wasted charges have piled up.
Why These Hidden Charges Silently Drain Your Bank Account
These charges are dangerous precisely because they are designed to be invisible. Most subscription-based apps use small monthly or yearly charges that do not trigger alarm bells. A ₹99 or $1.99 charge feels insignificant on its own, but when you have five or six running at the same time, the total adds up fast — which is exactly why knowing how to find and cancel zombie subscriptions on phone matters so much.
There are a few reasons these hidden charges are so easy to miss:
Auto-renewal is the default setting. Almost every app store enables auto-renewal automatically, so you never get asked for permission again after the first payment.
Free trials convert silently. Many subscriptions start as “free for 7 days” offers that quietly become paid plans the moment the trial ends.
Bank statements are text-heavy. Scrolling through dozens of transactions makes it easy to skip over recurring charges from unfamiliar app names.
Bundled subscriptions confuse users. Some services bundle multiple products together, making it harder to identify which specific plan is actually being billed.
Currency conversion hides the true cost. International apps sometimes bill in a foreign currency, so the converted amount looks slightly different every month, which makes the charge easy to overlook during a quick statement check.
Once you understand how these charges hide in plain sight, the next step is learning exactly how to find and cancel zombie subscriptions on phone for good.
How to Find and Cancel Zombie Subscriptions on Phone (iPhone Guide)
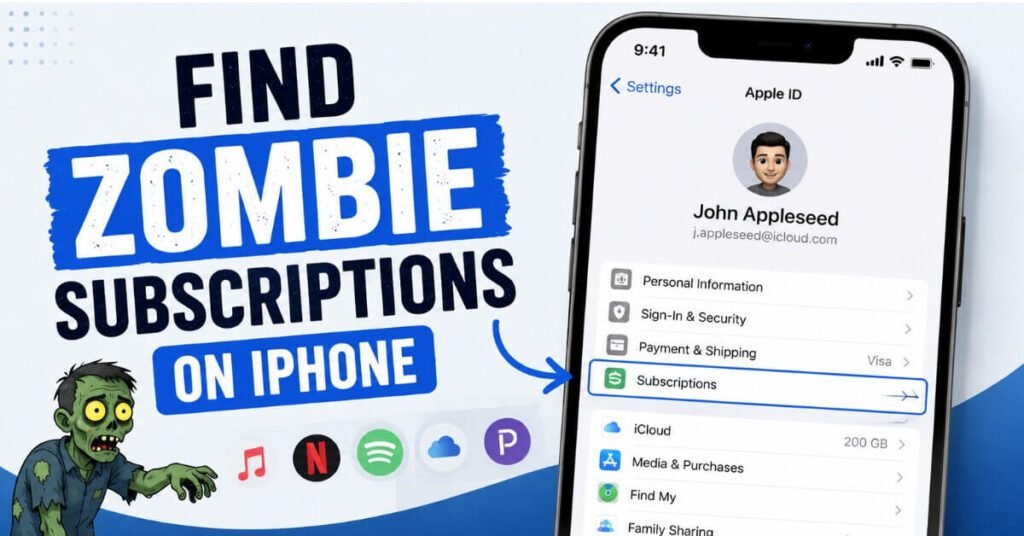
Apple keeps a running list of every active subscription tied to your Apple ID, which makes the process of how to find and cancel zombie subscriptions on phone fairly straightforward on iOS once you know where to look.
Step 1: Open the Settings app on your iPhone.
Step 2: Tap your name (Apple ID) at the very top of the screen.
Step 3: Tap Subscriptions. This screen shows every active and expired subscription connected to your Apple account, including ones billed through third-party apps.
Step 4: Review the list carefully. Any app you do not recognize or have not opened in months is a strong candidate for being one of these forgotten charges.
Step 5: Tap the subscription you want to stop, then tap Cancel Subscription and confirm.
It is worth noting that canceling a subscription this way does not immediately remove the app or delete your data — it simply stops the next billing cycle from being charged. This makes it a safe way to test whether you actually miss a service before permanently losing access to it.
If you share a family plan, some of these forgotten charges may also be hiding under a family member’s Apple ID, so it is worth checking shared accounts too when you go through how to find and cancel zombie subscriptions on phone as a household.
How to Find and Cancel Zombie Subscriptions on Phone (Android Guide)
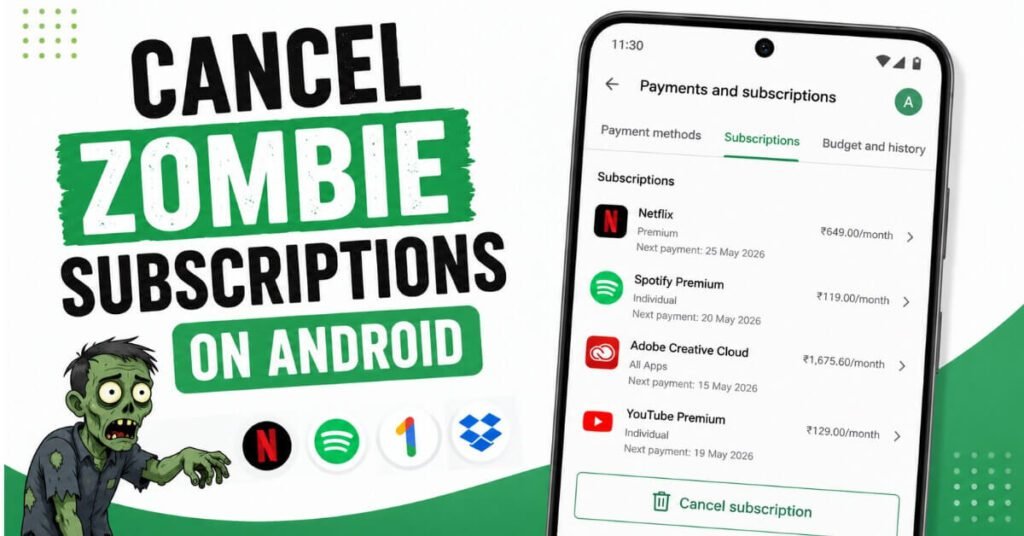
The process for how to find and cancel zombie subscriptions on phone looks slightly different on Android, since Google centralizes billing through the Play Store rather than through phone Settings directly.
Step 1: Open the Google Play Store app on your Android device.
Step 2: Tap your profile icon in the top-right corner.
Step 3: Select Payments & subscriptions, then tap Subscriptions.
Step 4: Go through the list one by one. This is usually where the largest number of forgotten charges are discovered, since Android users tend to install and forget more apps than iPhone users.
Step 5: Tap the service you want to end, then select Cancel subscription and follow the on-screen confirmation.
Keep in mind that not every recurring charge on Android runs through the Play Store. Some of these charges are billed directly by the service itself, for example a fitness app billing through its own payment gateway, so you may need to log into that app or website to fully complete the steps for how to find and cancel zombie subscriptions on phone.
Extra Ways to Find and Cancel Zombie Subscriptions on Phone
Even after checking your app store settings, some hidden charges can still slip through the cracks. Here are additional methods for how to find and cancel zombie subscriptions on phone that catch charges the standard subscription menus often miss.
Check Your Email Receipts
Search your personal email inbox using keywords like “subscription,” “renewal,” “invoice,” or “receipt.” Most companies send an automatic confirmation email every time a payment goes through, which means your inbox is often a more complete record of these charges than your phone’s settings screen.
Audit Your Bank and Credit Card Statements
Go through the last three to six months of your bank or credit card statements line by line. Look specifically for small, repeating charges from unfamiliar merchant names — these are classic signs of subscriptions you have not fully canceled yet. Anything billed directly by a website rather than Apple or Google is worth investigating further.
Use a Subscription Tracking App
Several third-party apps are built specifically to detect these hidden charges by scanning your linked bank account or email for recurring charges. These tools can save time compared to manually checking every app store menu, though you should always review app permissions carefully before linking any financial account.
Watch Out for Scam-Related Charges
Not every unfamiliar charge on your statement is a forgotten subscription — some are the result of phishing links or fake “subscription confirmation” messages sent through messaging apps. WhatsApp has recently rolled out safety tools to flag exactly this kind of risk; you can read more about it in our detailed guide on the latest WhatsApp features for 2026, which explains how the app is helping users spot suspicious senders before they cause financial damage.
Common Signs You Need to Find and Cancel Zombie Subscriptions on Phone
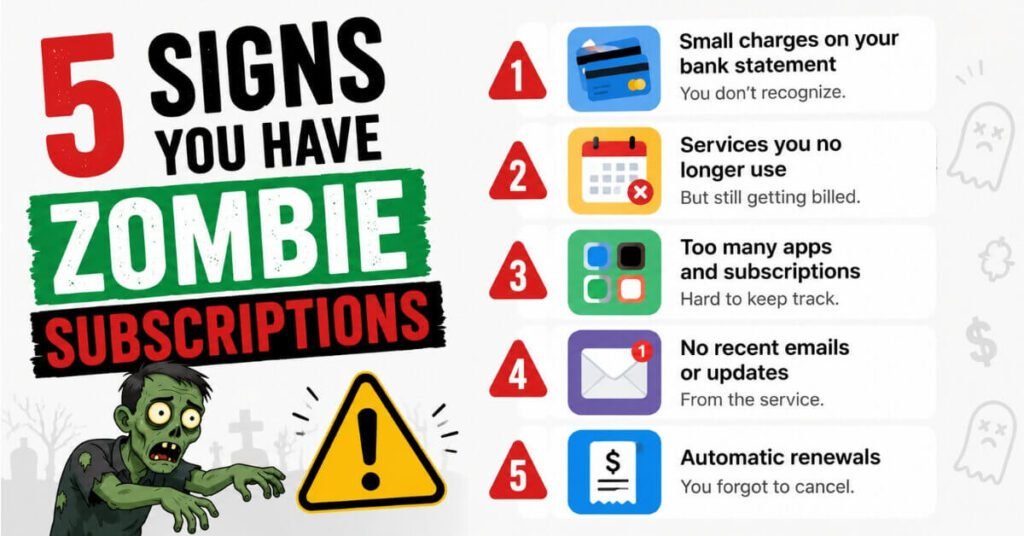
If you are not sure whether this problem is affecting your account, watch for these common warning signs:
You see a recurring charge but cannot immediately name the service attached to it.
An app is still installed on your phone, but you have not opened it in more than 60 days.
You signed up for a “free trial” months ago and never checked whether it converted to a paid plan.
Your bank statement shows multiple small charges under ₹200 or $5 that repeat every month.
You once shared your card details with a service for a one-time purchase, and it has continued billing you since.
You subscribed to a service for a specific event, like a wedding video editing app or a travel planning tool, and completely forgot to cancel once the trip or event ended.
Any one of these signs is a strong hint that it is time to go through how to find and cancel zombie subscriptions on phone before the next billing cycle hits.
How to Prevent These Charges After You Cancel Zombie Subscriptions on Phone
Finding and canceling existing charges is only half the job — the real win is stopping new ones from forming after you finish the steps for how to find and cancel zombie subscriptions on phone.
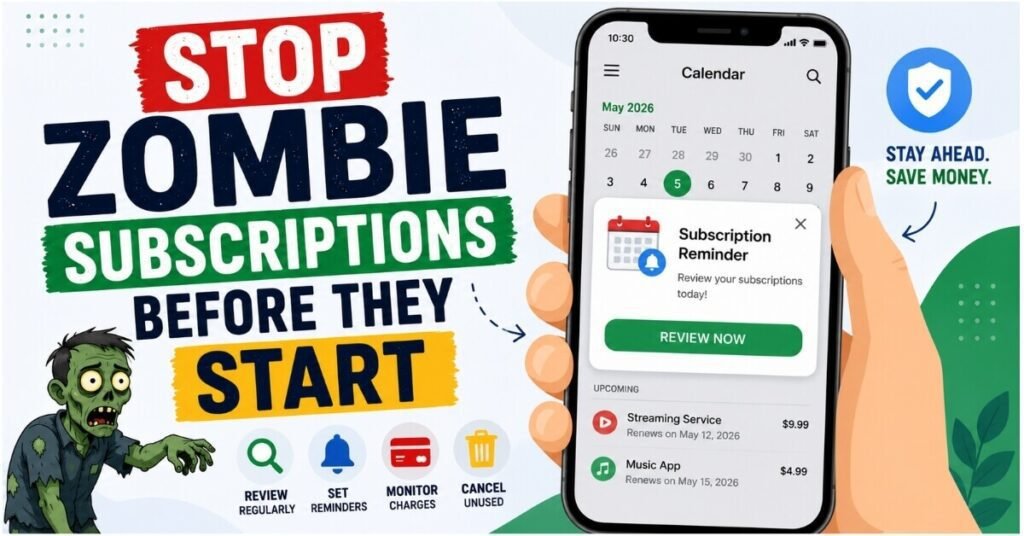
Set a calendar reminder before free trials end. The single biggest cause of these unwanted charges is forgetting that a trial period is about to convert into a paid plan. A simple reminder two days before the trial ends gives you time to decide and cancel if needed.
Use virtual or prepaid cards for trial sign-ups. Many banking apps now offer virtual cards with spending limits or single-use numbers. Using one of these for trial sign-ups means a forgotten renewal simply fails instead of quietly becoming another charge you will need to hunt down later.
Review your subscriptions list every quarter. Set a recurring habit — the first weekend of every quarter, for example — to open your Apple ID or Google Play subscriptions page and repeat the process of how to find and cancel zombie subscriptions on phone before charges have time to build up again.
Unsubscribe immediately after finishing short-term use. If you subscribed to an app for one project, one trip, or one event, cancel it the same day you are done rather than telling yourself you will “do it later.” Later is exactly how these charges are born.
Read the fine print on bundled offers. Some bundled deals combine two or three services into one subscription. Understand exactly what you are paying for so you do not end up with hidden charges tucked inside a package deal.
Keep a simple subscription list of your own. A basic notes app entry listing every active subscription, its price, and renewal date is more reliable than memory, and makes the whole task of how to find and cancel zombie subscriptions on phone far less overwhelming.
Zombie Subscriptions vs Normal Active Subscriptions
It helps to draw a clear line between a normal subscription and a zombie subscription before you start the process of how to find and cancel zombie subscriptions on phone. A normal subscription is something you use regularly and get genuine value from — your daily music app, your main cloud storage plan, or a streaming service you watch every week. A zombie subscription, on the other hand, is a charge that continues purely out of inertia, with no real usage behind it.
The test is simple: if you had to pay for the service again today, would you sign up for it? If the answer is no, it almost certainly belongs on your list for how to find and cancel zombie subscriptions on phone and should be canceled without hesitation.
For a deeper technical breakdown of how billing systems handle recurring charges, resources like the Google Play subscriptions help center explain exactly how auto-renewal and cancellation timing work, which is useful background knowledge for anyone working through how to find and cancel zombie subscriptions on phone for the first time.
A Quick Real-World Example
Consider a simple example. Someone signs up for a video editing app during wedding season, pays ₹149 a month, and finishes editing within six weeks. The app is deleted soon after, but billing quietly continues for eighteen months because the person never learned how to find and cancel zombie subscriptions on phone properly — costing nearly ₹2,700 for a tool used for less than two months. Multiply this across two or three sign-ups over a few years, and it is easy to see how these forgotten charges silently add up to money that could have gone toward savings instead.
FAQs About How to Find and Cancel Zombie Subscriptions on Phone
1. What is the fastest way to find zombie subscriptions?
The fastest way to learn how to find and cancel zombie subscriptions on phone is to check your Apple ID subscriptions page on iPhone or your Google Play subscriptions page on Android, since both list every active recurring charge in one place.
2. Does deleting an app automatically cancel the subscription behind it?
No. Deleting an app from your phone does not cancel the billing. You must manually complete the steps for how to find and cancel zombie subscriptions on phone through your Apple ID or Google Play Store settings, or directly through the service’s website.
3. How much money do these forgotten charges usually cost per year?
The exact amount varies, but studies suggest the average user loses several hundred rupees or dollars annually to charges they forgot were still active, which is exactly why checking your subscriptions list is worth fifteen minutes of your time.
4. Can these charges show up on someone else’s card?
Yes, if you previously used a family member’s card or a shared payment method for a sign-up, these charges can continue billing that card even after you stop using the service.
5. Is there a faster way to find all my active subscriptions at once?
Checking your Apple ID or Google Play subscriptions page is the fastest built-in method for how to find and cancel zombie subscriptions on phone. For a more complete picture, combine that with an email receipt search and a quick scan of your last three months of bank statements.
6. Will canceling a subscription immediately stop access to the app?
Usually not. Canceling a subscription typically stops the next billing cycle while letting you keep access until the current paid period ends, which makes it a low-risk way to test the process of how to find and cancel zombie subscriptions on phone without losing anything right away.
Conclusion
Zombie subscriptions may feel like a small, harmless problem, but left unchecked, they can quietly cost you thousands over the years. The good news is that how to find and cancel zombie subscriptions on phone is a simple process that takes less than fifteen minutes once you know where to look — your Apple ID settings, your Google Play Store subscriptions page, your email inbox, and your bank statements. Make it a habit to repeat this check every few months, and you will keep your money working for the things you actually use, not the ones you forgot about.
Disclaimer
This article is for general informational purposes only and does not constitute financial advice. Subscription policies, cancellation steps, and billing systems mentioned above may change over time as Apple, Google, and individual app developers update their platforms. Always refer to the official settings on your device or the service provider’s support page for the most current cancellation process before making any financial decisions.